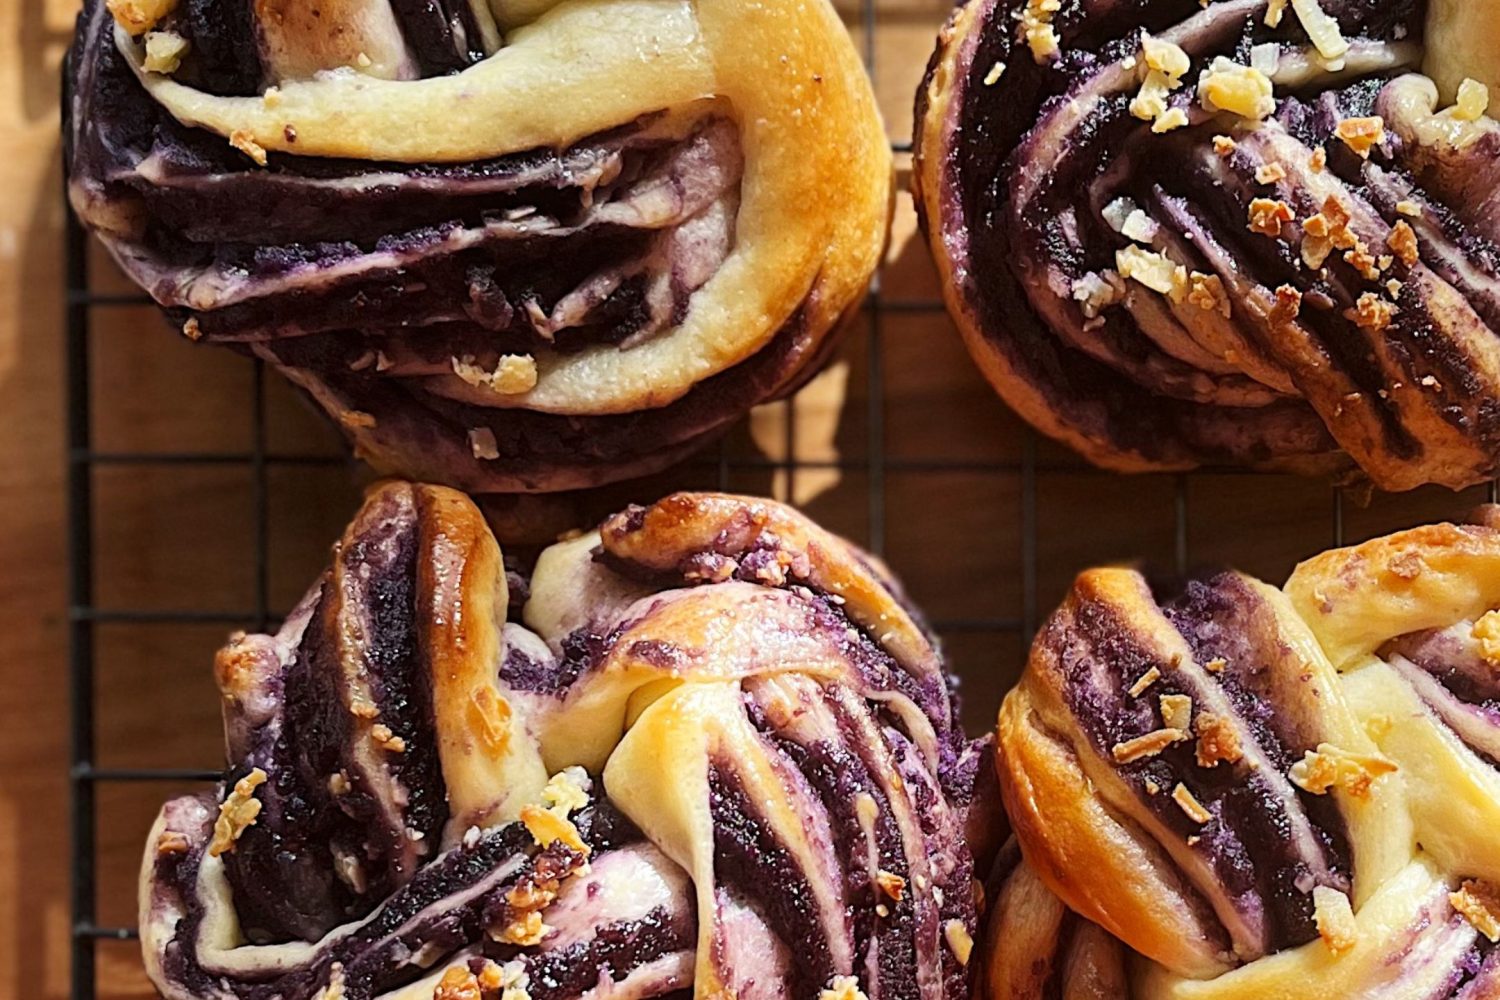
Soft milk bread buns with a sweet savory twist—literally!
A flavor combination seen in products like puto and dirty ice cream, ube cheese was the absolute *viral* pandesal variation in 2020. Some made them at home, while others ordered from their neighborhood bakers. Though the hype has since calmed down, ube cheese has earned its rightful place as a Filipino favorite—whether in pandesal or in other pastries (ube cheese cookies are great, too!).
Instead of pandesal, my take on this new classic starts with a soft milk bread base, braided to show bright stripes of ube halaya and cheese. Think of it as a handheld, Filipino babka! Worth trying, worth braiding, and worth making all over again (you can try other fillings, too!).
Check out this recipe on my TikTok!
Ube Cheese Braided Buns
Yield: 10 buns
Work Time: 45 minutes active + 90 minutes wait
Bake Time: 15 – 20 minutes
INGREDIENTS
Buns
- 375g bread flour
- 75g granulated sugar
- 6g instant dry yeast
- 10g fine salt
- 50g egg (1 large)
- 236g whole milk
- 75g unsalted butter, melted and cooled
- Extra flour only if needed, see tips.
Filling
- 250g ube jam
- Ube extract to taste
- 120g cheese
Egg wash
- 1 egg
- 1 tbsp. water
METHOD
- MIX. In your stand mixer fitted with the dough hook, combine bread flour, sugar, and instant dry yeast. Mix for a few seconds, then stream in your milk, egg, and melted butter. Knead on low-medium speed until it forms a rough dough, then add salt.
- KNEAD. Starting on medium speed, gradually increase to high speed and knead until the dough is smooth, stretchy, and passes the windowpane test. This step can take anywhere from 15-30 minutes, depending on the strength of your mixer. See tips.
- PROOF. Shape the dough into a ball, then place into a large bowl. Cover with cling wrap and allow to proof in a warm area for 60 minutes or until at least doubled in volume. (Note: Proofing takes longer in cool weather!)
- PREP FILLING. While the dough is resting, prepare the filling. Place ube jam in a bowl and mix with a spoon or spatula until spreadable, then add ube extract to intensify the flavor. In a separate bowl, shred cheese using a fork or grater.
- DIVIDE. After proofing the dough, uncover and punch down the gases. Divide the dough into 10 equal pieces, about 78-80g each.
- FILL AND FREEZE. Flatten each piece into a 6×8-inch rectangle. Add 2-3 tablespoons of ube jam and spread to cover the entire surface. Sprinkle shredded cheese on top, then roll the rectangle into a 6-inch log, making sure to pinch the seams. Repeat for all pieces then place on a parchment-lined plate or baking tray. Freeze for 15 minutes or until firm.
- SHAPE. Working one piece at a time, place each log vertically on your work surface. Using a large knife, cut in half lengthwise to form two half-logs with exposed ube cheese ‘stripes’. Place them side by side and pinch the tops together. Twist over each other to resemble a braid, then roll into a bun and pinch the seams underneath. Place on parchment-lined trays. (Check out my shaping video here.)
- PROOF. Cover the buns with cling wrap and proof in a warm area for 30-40 minutes or until at least doubled in volume. (Note: This may take longer depending on how frozen your logs were before shaping). Meanwhile, preheat your oven to 180°C.
- EGG WASH. Prepare the egg wash by beating the egg and mixing with water. Lightly brush on the proofed buns.
- BAKE. Bake at 180°C for 15-20 minutes or until golden brown. Cool on a wire rack and enjoy!
TIPS
How do I know when to stop kneading?
The total kneading time is highly variable. Factors such as the strength and size of your mixer, the brand of your bread flour, and more can affect this step. It’s important to note that the main objective of kneading is to build structure through gluten development.
Follow these visual cues, and you’re in for a successful batch:
- The dough is much smoother.
- The dough is very stretchy and less sticky.
- The dough passes the windowpane test.
If after 20 minutes of kneading your dough is still very sticky, you can sprinkle small amounts of flour, no more than a teaspoon at a time.
For the best tasting ube-cheese filling…
Customize your jam! I add about 2 teaspoons of ube extract to my store-bought ube jam to intensify the flavor, but this also varies depending on the brand I’m using. If you want your ube jam sweeter (this pairs well with cheddar cheese!), you can also add a little condensed milk.
For easier shaping…
Keep your other logs cold while you shape the buns. Braiding cold, firm dough is much easier than working with room temperature dough, but do note that it may take longer for the buns to complete their final proofing.
Thank you for checking out my recipes! Let me know when you try them out. If you have any questions, comment below or reach me on TikTok / Instagram!
How useful was this post?
Users rated this 0 / 5. Rate count: 0
Be the first to rate this.


1 thought on “Ube Cheese Braided Buns”
Pingback: Coco Jam Swirl Buns Recipe - Hello Bake PH