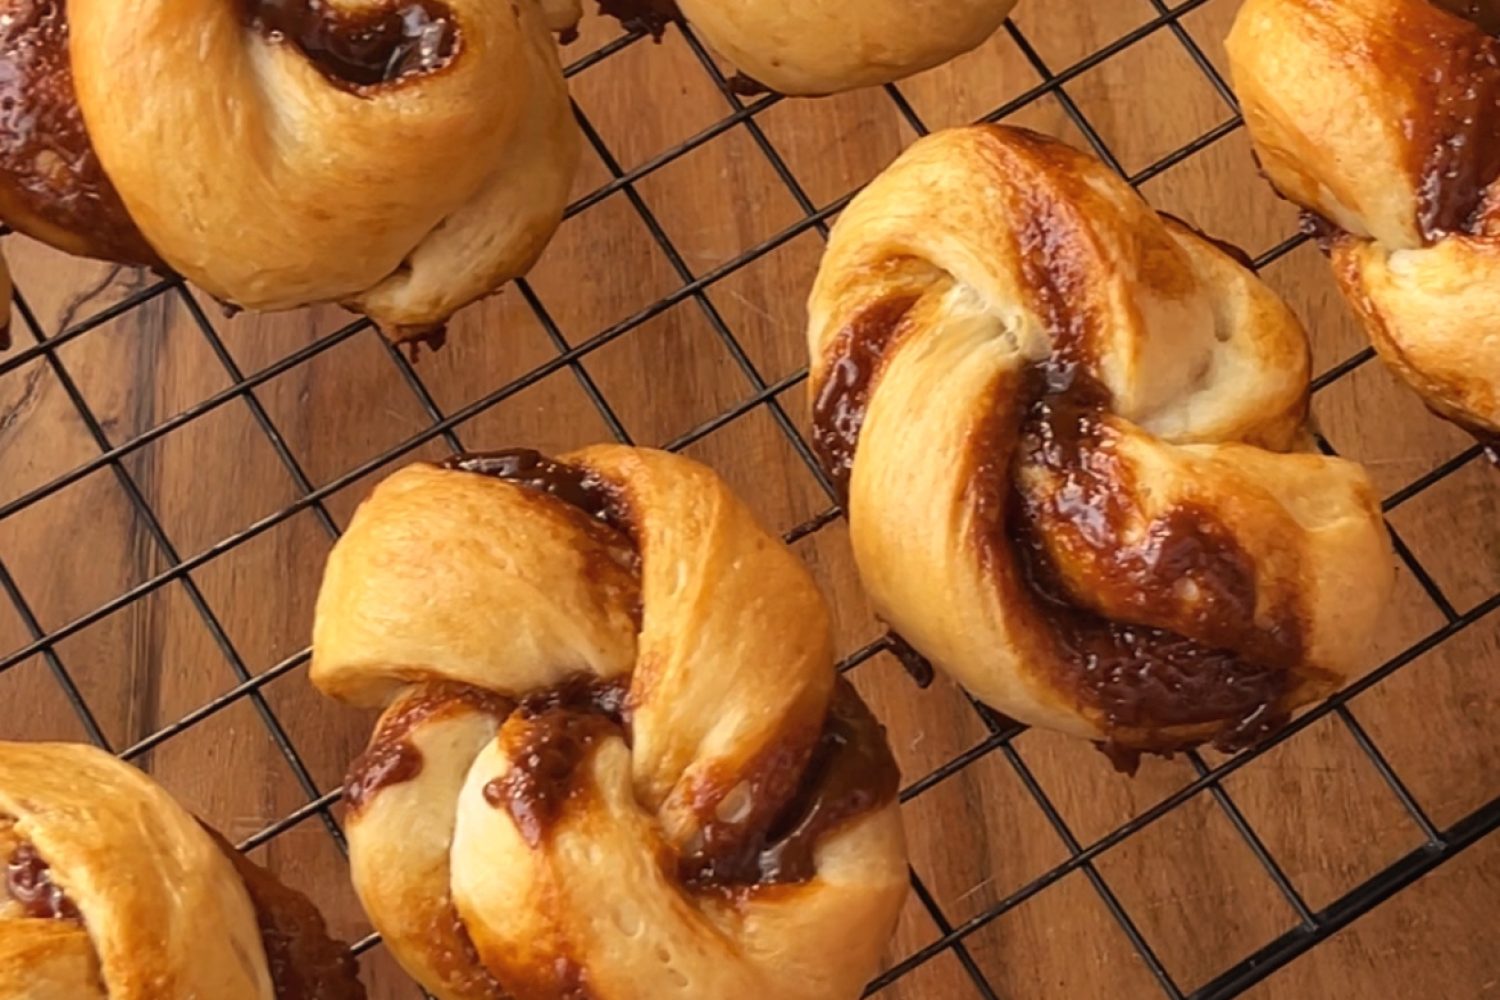
Sweet, soft buns with a Filipino *twist* ☀️
Have you ever come across a recipe and thought… “I’m too lazy to make that”? Because tbh, same.
While I love being creative and trying ALL bread variations, it’s the simple ones I know I’ll keep coming back to—and it’s the simple ones I know you’ll love, too. Like our Pandesal and Milk Bread recipes!
Baking can seem intimidating, especially if you’ve never tried it before. Sometimes, all you need is a doable recipe with fewer components, like these Coco Jam Swirl Buns. The dough is pretty straightforward, and the sweet caramelized filling is just spoonfuls of ready-to-eat coco jam—which is already amazing on its own, and is widely available in Filipino supermarkets.
The shaping is the most “difficult” part of this recipe, but also the most fun! With our beginner-friendly recipe and tips, you’ll have these pretty, swirly, coconutty buns soon. A “senior-approved” pastry I hope you’ll enjoy just as much!
Try it out and let me know what you think! You can also check out our TikTok for a quick tutorial. A must for fellow visual learners!
Coco Jam Swirl Buns Recipe
Yield: 18-20 buns
Work Time: 2 hours, mostly inactive
Bake Time: 15-20 minutes
INGREDIENTS
Dough
- 360g bread flour
- 60g granulated sugar
- 6g salt
- 6g instant dry yeast
- 225g canned coconut milk, well-stirred (not coconut cream! See tips.)
- 28g eggs (½ large egg), beaten
- 55g unsalted butter, softened
Filling
- coco jam, as needed (about ⅓ cup)
Egg Wash
- 28g eggs (½ large egg)
- 10g water
METHOD
- MIX. In a large bowl or in your stand mixer fitted with the dough hook, mix bread flour, instant dry yeast, and sugar. Add coconut milk and eggs. Knead until the liquid is absorbed, then add softened butter. Continue kneading until it forms a rough ball, then add salt.
- KNEAD. Knead until the dough is smooth, stretchy, and passes the windowpane test, about 8-10 mins. (Note: Kneading time varies on your arm/mixer strength. Go by visual cues.) See tips.
- PROOF. Shape the dough into a ball. Place into a greased bowl, cover with cling wrap, and proof for 1 hour or until doubled in size.
- DIVIDE. Punch down the dough and divide into 2 portions, about 360g each. Flatten each portion into a large rectangle, about 8×10 inches oriented horizontally. Cover and chill in the freezer for 5-10 mins.
- SPREAD. Spread a thin layer of coco jam all over, leaving 1cm on the top and bottom edges. Fold in half crosswise and seal the bottom edge. Re-roll with a rolling pin to a 6×10-inch rectangle.
- CUT. Cut the dough into strips. You will end up with about 20 pieces, about 6×1-inch each. Loosely cover with cling wrap as you proceed to shaping.
- SWIRL. One by one, twist strips and swirl into a bun. Pinch the ends and tuck underneath, then arrange on parchment-lined baking trays—leaving ample space between each bun.
- PROOF. Cover with cling wrap and proof in a warm area for 30-45 minutes or until doubled in size. Meanwhile, preheat oven to 180°C.
- EGG WASH. In a small bowl, mix egg and water. Lightly brush egg wash over the proofed buns, avoiding the filling.
- BAKE. Bake at 180°C for 15-20 mins. or until the buns are golden brown. Transfer to a wire rack to cool. Enjoy!
TIPS
How do I know when to stop kneading?
There are many variables in making dough! Total kneading time depends on your arm strength, mixer speed, & more. As a rule of thumb, start slowly to incorporate the ingredients. Once it comes together, increase speed or knead by hand more vigorously. Here are the main visual cues to know if your dough is well-kneaded:
- The dough is much smoother.
- The dough is very stretchy and less sticky.
- The dough passes the windowpane test.
Do I have to freeze the dough?
Cold dough is easier to work with! As you handle the dough, it becomes stiffer and more resistant to shaping. Letting it chill in the freezer for 5-10 minutes relaxes the gluten strands, making it easier to roll and twist later on. Try this tip with other shaped breads as well!
Hmmm.. coconut milk for the dough?
Coconut milk imparts a mildly sweet flavor while still mimicking the texture of regular milk bread. The result is a light and sweet bun that complements the richness of the coco jam. Selfishly, as someone who’s dairy intolerant, switching the milk to non-dairy also makes the buns easier for me to consume. 😁
Need to substitute? Here’s how!
If you don’t have coconut milk, use 200g whole milk and 55g (instead of 28g) egg! I don’t suggest you use coconut cream as it has a much higher fat content which could interfere with gluten development.
I want to try other variations!
Sure thing! This dough also pairs well with other spreads like ube jam and cheese, like in this recipe.
Thank you for checking out my recipes! Let me know when you try them out. If you have any questions, comment below or reach me on TikTok / Instagram!
How useful was this post?
Users rated this 0 / 5. Rate count: 0
Be the first to rate this.


