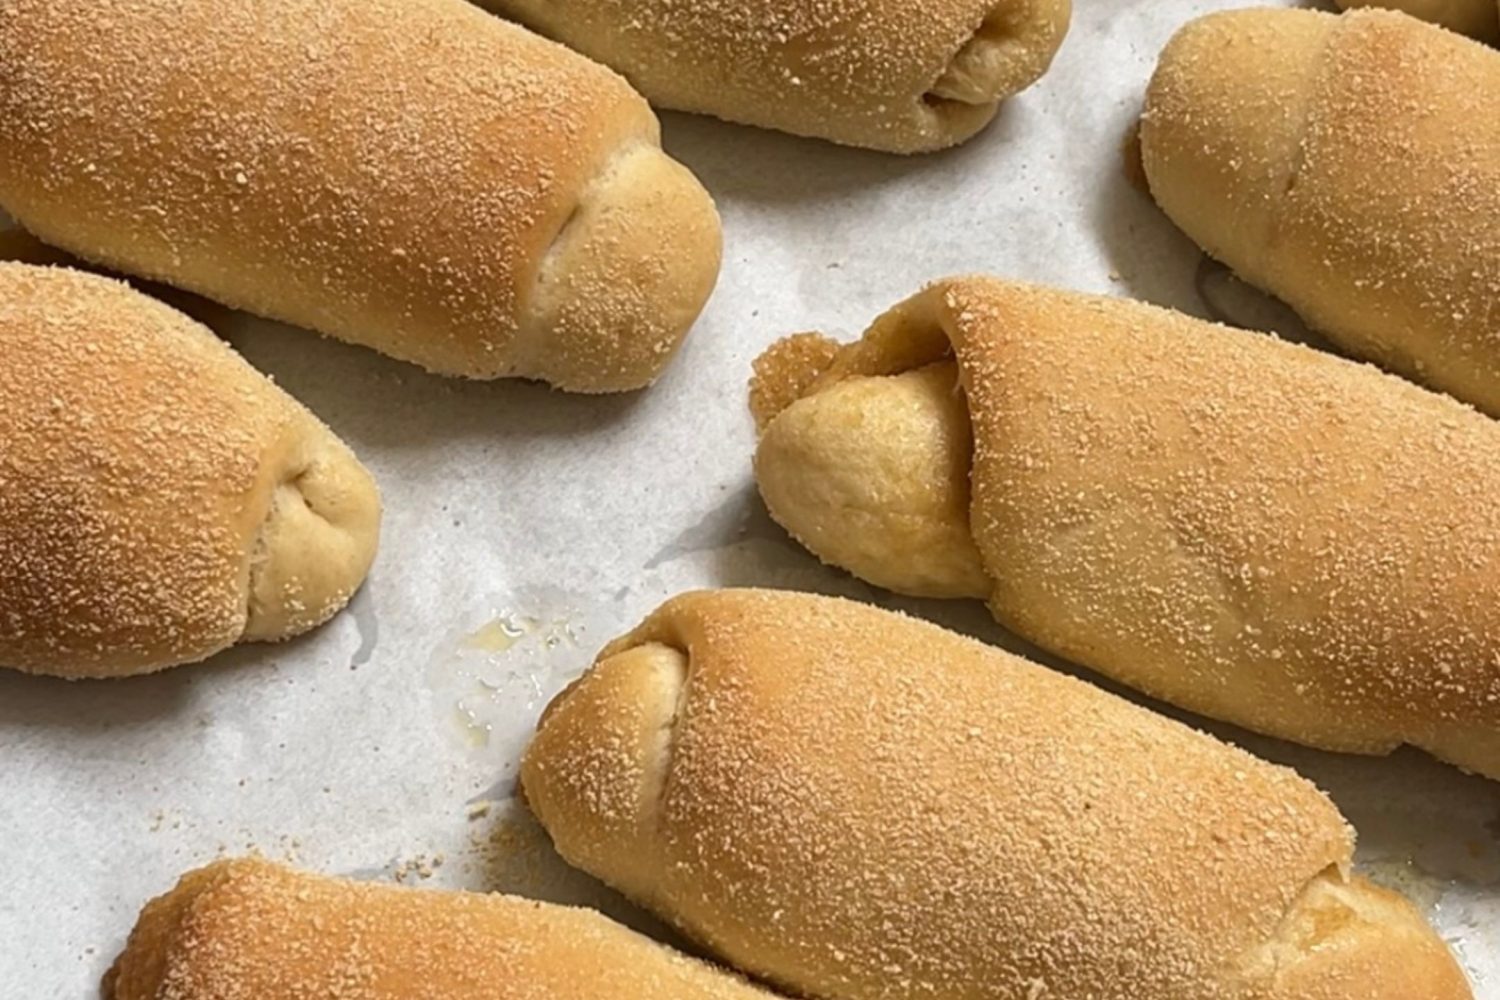
A Filipino classic (ironically?): Spanish Bread.
Said to take after both the Filipino pandesal and Spanish ensaimada, this bread baby has been around for centuries. With a pillowy base dough similar to pandesal similarly covered in toasty bread crumbs, it envelopes a buttery, sugary filling that smells like home.
I try not to play favorites when it comes to Filipino bread, but Spanish Bread is definitely up there. (Please don’t tell Pandesal!)
Check out the recipe below! You can also refer to this TikTok for a quick tutorial.
Spanish Bread
Yield: 10 pieces
Work Time: 30 minutes active, 90 minutes wait
Bake Time: 15 minutes
INGREDIENTS
Dough
- 250g bread flour
- 50g brown sugar
- 7g fine salt
- 5g instant dry yeast
- 30g unsalted butter, softened
- 55g eggs (1 large)
- 65g whole milk, room temp.
- 65g water, room temp.
- Fine bread crumbs for coating
Filling
- 80g brown sugar
- 80g unsalted butter, softened
- 40g fine bread crumbs
- Pinch of salt to taste
METHOD
- MIX. In your stand mixer fitted with the dough hook, combine bread flour, sugar, and instant dry yeast. Mix for a few seconds, then stream in your water, whole milk, and beaten egg, Knead on low speed until it forms a shaggy dough, then add softened butter. Knead on low-medium speed until fully absorbed, then add salt.
- KNEAD. Knead on medium-high speed until smooth, stretchy, and forms a windowpane, about 10 mins. or more. See tips on kneading.
- PROOF. Shape the dough into a ball, then place into a large bowl. Cover with cling wrap and allow to proof in a warm area for 60 minutes or until doubled in volume. (Note: Proofing takes longer in cool weather!)
- MIX FILLING. In a bowl, combine brown sugar, softened butter, and bread crumbs. Mix with a spatula until it forms a uniform paste. Add salt to taste, about a pinch to 1/4 teaspoon. Mix and set aside.
- DIVIDE & PRESHAPE. After proofing, gently punch down the dough. Divide into 10 pieces, about 50g each. Pre-shape each piece into a ball. Cover and rest for 5 mins.
- SHAPE. Flatten each ball into a rectangle, placed vertically with the bottom edge slightly wider than the top (more like a trapezoid). Spread a spoonful of filling over each piece. Roll upwards and seal the top edge.
- COAT. Coat the rolls in bread crumbs and arrange on a parchment-lined baking tray, seam-side down and spaced 1-2 inches apart.
- PROOF. Cover and rest for 30 minutes or until about doubled in size. Meanwhile, preheat the oven to 180°C.
- BAKE. Bake at 180°C for 15 minutes or until golden brown. Cool on a wire rack and enjoy!
TIPS
How do I know when to stop kneading?
The total kneading time is highly variable. Factors such as the strength and size of your mixer, the brand of your bread flour, and more can affect this step. It’s important to note that the main objective of kneading is to build structure through gluten development. Follow these visual cues, you’re in for a successful batch:
- The dough is much smoother.
- The dough is very stretchy and less sticky.
- The dough passes the windowpane test.
If after 10 minutes of kneading your dough is still very sticky, dust a small amount of bread flour about half a teaspoon at a time.
For easier shaping…
Dust a small amount of flour on your work surface and/or on your rolling pin.
Can I use margarine instead of butter?
Margarine is commonly used in Filipino homes and panaderias as a butter substitute. Feel free to use this especially for your filling, but adjust the sugar and salt according to taste.
How can I store these?
Store in an airtight container to retain freshness for several days. You can also store extra filling in the refrigerator—spread on sandwich bread and toast in the airfryer for a sweet treat!
Thank you for checking out my recipes! Let me know when you try them out. If you have any questions, comment below or reach me on TikTok / Instagram!
How useful was this post?
Users rated this 5 / 5. Rate count: 4
Be the first to rate this.


