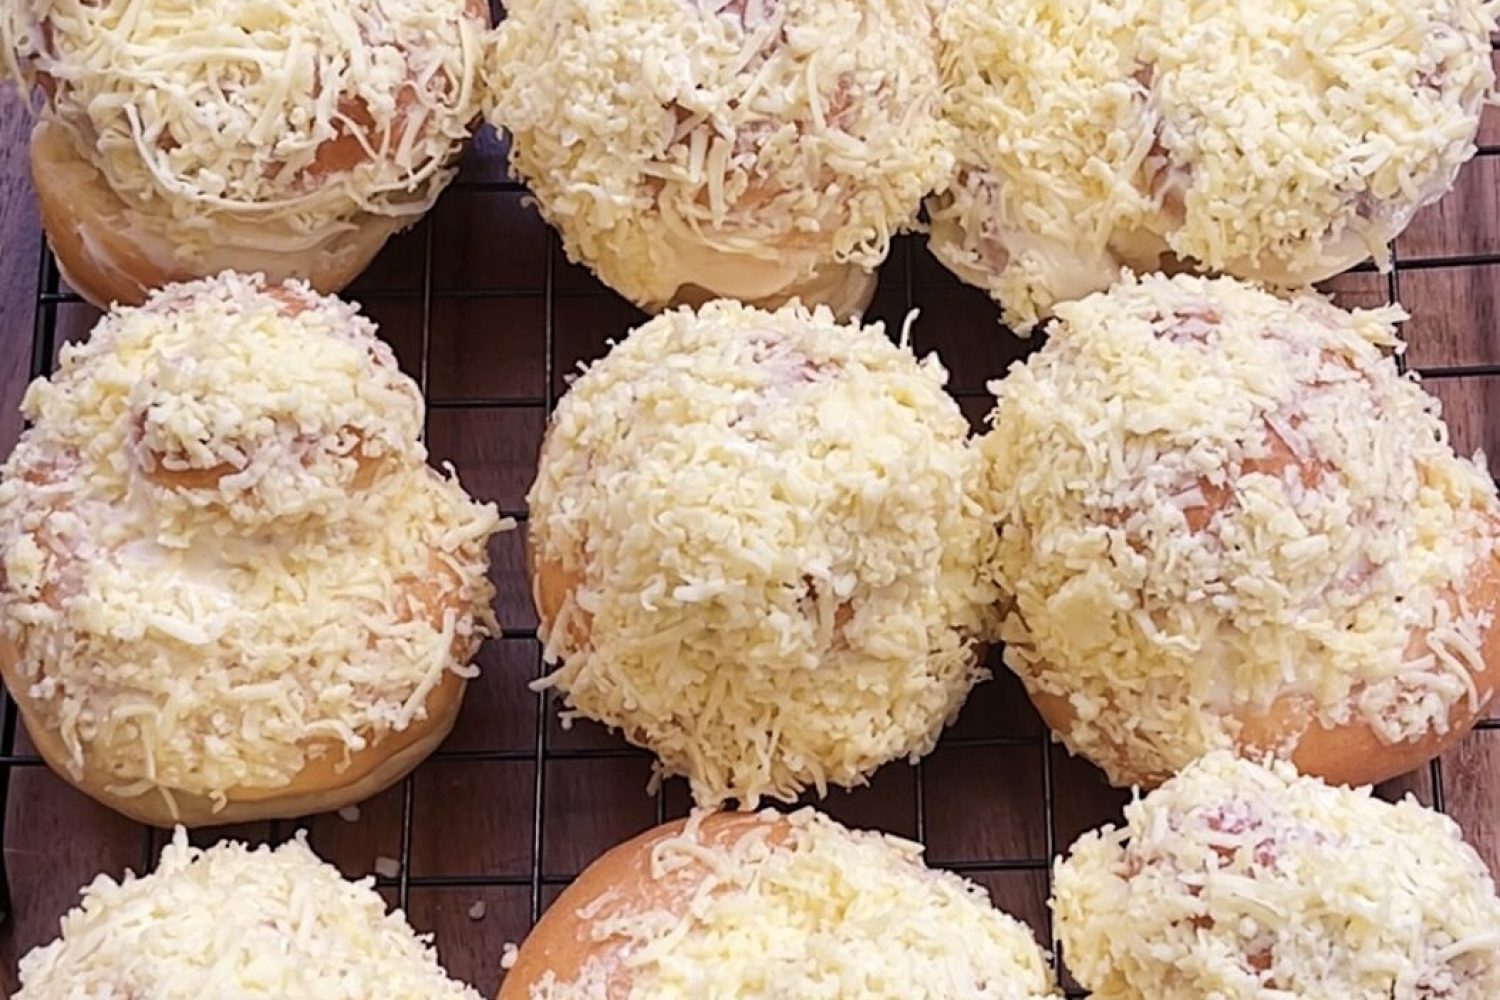
Ask and you shall receive.
Cheesy ensaymada is one of your most requested recipes, and for good reason: It’s just. Too. Good!
This crowd favorite is available in most Filipino panaderias, from small neighborhood bakeries to large bakery chains. You’ll even find modern variations with things like ube, dulce de leche, salted egg, and more.
Minus all the extras, classic Filipino ensaymada is typically topped with butter and cheese—but did you know that the original Spanish ensaymada, actually spelled “ensaimada”, had none of these?
All the way from Mallorca, Spain, ensaimada is named after one of its key ingredients: “saïm”, which means pork lard in Catalan. Freshly baked spiral buns are brushed with the saïm, then topped with a heavy dusting of icing sugar. No cheese or butter!
Adapting to centuries of Spanish influence in our food and culture, the Filipino ensaymada we know today is never truly complete without cheese and buttercream—so we made sure to add tons of it in this (mildly challenging, but highly doable) recipe. We’re also using the sponge method to make the dough extra soft!
The result? Cloud-like spiral buns, with pockets of sweet buttercream and salty cheese—a treat you’ll love for breakfast, merienda, or any time of the day. Some may say it’s best paired with hot chocolate, but we say it’s best enjoyed with another serving or two (plus the chocolate, or hot coffee!).
Let me know if you try this cheesy ensaymada recipe! Be sure to check out our tutorial on TikTok as well.
Cheesy Ensaymada
Yield: 12 pieces
Work Time: 45 minutes active + 2 hours wait
Bake Time: 12-15 minutes
INGREDIENTS
Sponge
- 125g bread flour
- 125g milk
- 5g instant dry yeast
Dough
- 125g all-purpose flour
- 50g granulated sugar
- 60g egg yolks (3 large)
- 55g egg (1 large)
- 60g unsalted butter, melted and cooled
- 5g salt
- Extra flour for kneading and shaping
Buttercream and Cheese Topping
- 165g unsalted butter, softened
- 115g powdered sugar, sifted — add more to taste
- Grated cheese for topping, about 1-1.5 cups. See tips.
METHOD
- SPONGE. In a large bowl, prepare the sponge: Mix bread flour, milk, and instant dry yeast with a spatula until paste-like. Cover and rest for 30 minutes.
- MIX. Transfer the sponge to the bowl of your stand mixer, fitted with the dough hook. Add all-purpose flour, sugar, egg yolks, egg, and melted butter. Knead starting on low speed until well-incorporated into a sticky, but mostly uniform mass, then add salt.
- KNEAD. Knead continuously while gradually increasing speed to medium-high for 10-20 mins. or until the dough is still quite sticky, but very stretchy and forms a windowpane. Only add 1-2 teaspoons of flour if needed. See tips.
- PROOF. On a lightly floured surface, roughly shape dough into a ball and place into a greased bowl. Cover with cling wrap and proof in a warm area for 60 mins. or until doubled in size. (Note: Proofing takes longer in cool weather.)
- BUTTERCREAM. While the dough is proofing, prepare the buttercream: In a medium bowl, add softened butter and powdered sugar. Whisk vigorously for about 5 minutes, until fluffy and much lighter in color. Add sugar to taste and refrigerate until ready to use.
- DIVIDE. After proofing, punch down the dough. Divide into 12 equal pieces, about 40-45g each.
- SHAPE. Lightly dust your work surface and rolling pin with flour. One at a time, flatten each piece into a narrow rectangle. Roll into a 10-12 inch log, making sure to pinch the seams. Twirl into a spiral, keeping it parallel and tucking the end underneath. See tips.
- PROOF. Place the spiral buns onto parchment-lined baking trays, with ample space in between. (I do 2 trays x 6 buns.) Cover and proof for 20-30 mins. or until visibly doubled in size. Meanwhile, preheat the oven to 180°C.
- BAKE. Bake at 180°C for 12-15 minutes or until golden. Transfer buns to a wire rack to cool completely before topping.
- TOPPING. Whisk the chilled buttercream until spreadable. Top each bun with a tablespoon of buttercream and generously sprinkle grated cheese. Store in an airtight container for 1 day at room temperature, or in the refrigerator for 3-4 days. Enjoy!
TIPS
What cheese should I use?
For classic Filipino ensaymada, your usual grocery-available boxed cheddar cheese works best. If you’re feeling fancy, you can opt for Edam, Manchego or other mild-salty semi-hard cheeses.
This dough is so sticky! Am I doing something wrong?
Trust me, I also found it too sticky—and then I realized, it’s way fattier than my other recipes. Fat sources in this recipe are the melted butter, whole milk, egg, and 3 large egg yolks. Fat inhibits gluten development, which is why it may be harder to give the dough its usual strength and structure. Not to worry—as long as you have a pretty uniform, very stretchy dough that passes the windowpane test, you’re good to go!
How do I know when to stop kneading?
The total kneading time is highly variable. Factors such as the strength and size of your mixer, the brand of your flour, and more can affect this step. It’s important to note that the main objective of kneading is to build structure through gluten development. Follow these visual cues, you’re in for a successful batch:
- The dough is mostly uniform.
- The dough is very stretchy.
- The dough passes the windowpane test.
If after 10 minutes of kneading your dough is still very sticky, you can sprinkle small amounts of flour, no more than a teaspoon at a time.
How to shape ensaymada?
Ensaymada can be shaped into round buns instead of the traditional spiral buns, but the latter works best to hold pockets of sweet buttercream on top. When shaping, make sure you don’t twirl too tightly, and to keep the spiral parallel or the same height. This allows the bun to expand outward (instead of just upward into a cone), even without an ensaymada mold.
Storage and reheating tips?
Store in an airtight container for 1 day at room temperature, or in the refrigerator for 3-4 days. To serve, reheat in the microwave for 10 seconds or until soft.
Thank you for checking out my recipes! Let me know when you try them out. If you have any questions, comment below or reach me on TikTok / Instagram!
How useful was this post?
Users rated this 5 / 5. Rate count: 1
Be the first to rate this.


